New to bikepacking? Are you excited to go further on the trail, and experience riding a bike in some of the most beautiful and remote places? We've updated this guide (June 2022) to include some updated information and staff tips based on our recent experience bike packing in our new MTB line. We're excited to share the tips we've pulled together and hope this comprehensive guide to the newbie bikepacker gives you the confidence to get out there this summer!

Gearing Up
First thing's first: you don't need the fanciest, best gear out there to get started. Investing in quality gear is great, but it’s not necessary to start. Our advice? Work your way up to multi-day rides by starting with a short ride near home and get creative with the gear you have. See what works for you, and what you wish you had. You’ll discover through experience what’s necessary for subsequent, longer rides.
Staff Tip:
"Know before you go! Studying the route, understanding how to use your gear, and doing a couple test packs on your bike can inspire confidence and negate some potential headaches on the trip."
Your Bike
When it comes to your bike, don’t overthink it. Usually, the bike you have will be sufficient, but it doesn’t hurt to scour the classifieds for a second hand, cross country hardtail or adventure/gravel bike. Both these will offer more frame space, possible attachment points and an all-around fun ride. However, consider the terrain on which you’ll be riding, as well as whether or not your wheels/tires are capable of providing stability and traction on a variety of rough terrain. You might need to limit your ride selection if you know your bike cannot handle gravel, dirt roads, and/or singletrack trails. Do your research and plan your route based on the qualities of your bike.
It’s also good to consider your gearing before setting out on your selected ride. “Proper gearing is something you just have to feel out based on the situation, as well as your own skill, strength and biomechanics – though starting low is never a bad idea. Know what gearing works for you and make a note of it to have as reference when purchasing a drivetrain or fine tuning your existing setup.”
Beyond the bike itself, the saddle and handlebars will determine comfort levels in the long run, so consider trying out the saddle a few times before setting out on the trip, or replacing it altogether if you experience pain or discomfort. Additionally, having the right handlebar grips can relieve stress on the wrist and hands, so Ergon grips are a great addition that will keep you comfy.
Emergency Kit Basics
Bikepacking often involves riding through remote and rugged terrain that can be hard to reach by emergency services, so it’s absolutely essential to bring a first aid kit. What should I bring in my kit you might ask? We have a basic checklist for you.
- Clean water. Be sure to bring along a way to make clean water. Whether that’s with a filtration system or iodine tablets, clean water will no doubt be a maker/breaker.
- Soap: Soap isn’t an essential item but it can come in handy when cleaning a wound or if you find some nice water in which to bathe. Remember to choose Dr. Bronners or castile soap as this can be used in rivers and streams without harming the environment.
- Irrigation Syringe: This will help to flush wounds if you find yourself on the side of the road with a deep cut.
- 4-5 Povidone-Iodine (Betadine) Prep Pads (wipes/towelettes/small bottle): This is better for wound disinfection and healing than alcohol or hydrogen peroxide
- A Good Pair of Tweezers: Stainless steel and pointed to remove spines, splinters, visible wound debris and ticks.
- Bandaids: Choose an assortment of small, medium and large.
- 2-3 Butterfly Bandages: Perfect for closing large cuts that would otherwise necessitate stitches.
- 1 Small Roll Gauze Bandage: Wrap wounds as needed
- 1 Large Sized Sterile Non-Stick Pad: Great for wounds that don’t necessitate gauze bandage.
- 1 Roll Self-Adhering Compression Wrap: An elastic Ace wrap would work nicely.
- Bandana or Triangular Bandage: With the proper knowledge, you can make tourniquets to stop major blood loss, splint fractures, plug puncture wounds, and immobilize upper extremity injuries like a dislocated shoulder or fractured collarbone.
- Antibiotic Ointment (Neosporin, Polysporin): 1 small tube to keep infection at bay.
- 2-3 Safety Pins
- Ibuprofen: Alleviates pain, muscle aches, and inflammation.
- Benadryl: Great for mitigating the effects of allergic reactions.
- Epinephrine AKA An Epipen: You might not need it, but it’s better to have it and not need it than need it and not have it.

Tool Kit
A good tool and repair kit are essential when it’s time to address a mechanical issue, so let’s talk tools and bike repair essentials you'll want to pack. Again, we've got a list to make things a little easier for you.
- Multi-Tool (With Chain Breaker): Without the multi-tool, you’re gonna have a bad time - guaranteed. Make sure your tool has the correct sizes of Allen and Torx keys to fit the parts of your bike.
- Leatherman With Pliers: There are many reasons you might need pliers while out riding, so again, it’s better to have them and not need them than need them and not have them.
- A Reliable Pump: This is a no-brainer really.
- 15mm Wrench: The Portland Design Works 3wrencho is a solid option and doubles as a tire lever.
- Spare Tubes: Even when running a tubeless setup, spares are a necessity. Bring one on shorter trips and two on longer trips. If both fail, then it’s time to get patchin’.
- Patch Kit: If you’re using a traditional patch kit, be sure the cement isn’t dried out and the sandpaper is in good shape.
- Tire Levers: Changing a tire without these is a lesson in futility. Spring for the Nylon ones.
- Park Tool Tire Boots: If you blow out a tire, these are a quick and effective way to get back on the road.
- Extra Sealant: If you’re running tubeless, then one or two, 1-ounce Stan’s bottles will do just fine.
- Tire Plugs: Tire plugs can really come in handy when trying to repair 3/16’’ tears that stubbornly won’t reseal.
- Super Glue: Another option for small punctures or capping off a plug for a quick fix.
- Dry Chain Lube: Keep that drive train clean and lubed for optimum performance.
- Zip Ties: They fix more than you would expect and they weigh almost nothing.
- Gorilla Tape: A quick way to fix almost anything.
- Quick Chain Links / Powerlinks: Get two or three pairs for whatever size chain you have, as well as a small spare length of chain.
- Spare Cleat and Boots: If you ride clipless then it’s a good idea to bring an extra pair of bolts and cleats in case they fall off.
Baggage

Bike specific soft bags have really helped popularize bike packing, and for good reason. Light, rattle free, and tailored to fit modern bikes, they effectively increase carrying capacity without significantly adding weight and negatively affecting handling. Consider investing in a seat pack and roll bag that attaches to the handlebars. What’s more, if you’re set on your bike, then consider a frame bag as well.

Store a change of clothes and some smaller bits and bops in your seat post bag. A good size would be around 5-7 liters. Make sure it’s waterproof, as it will sit just above your back tire which will kick up plenty of water and dirt. Pro Tip: Add something stiff within the bag to help stabilize the ride.
Staff Tip:
"Layering in light merino layers is key to staying comfortable while backpacking. You don't want to be caught in a rainstorm unprepared but It's easy to overheat when climbing, having extra space in your bags for a rain jacket or extra layers when the sun breaks through will help you stay comfortable and prepared."
Another great location to store gear is on your handlebars. It’s recommended that you spring for a larger 14-20 liter dry bag that cinches to the handlebars with webbing, Voile straps, or built in straps. A great place to store your tent (the poles will help keep the bag straight), and a lightweight down sleeping bag. Take note that long and slender bags work better than short, fat ones.

They’re not necessary but still great to have. A frame pack is designed to fit within the bike’s center triangle, and we find that they make storing food and kitchen paraphernalia easy. A compact stove, along with simple aluminum (a great weight saving choice) pots and pans that double as eating surfaces fit easily with a triangle bag.
Depending on what type of bike camping you’ll be doing, you might not need much more in terms of baggage. However, we do find it convenient to ride with a top tube bag, as this can store essential gear that you need to access quickly and easily. Its position on the top tube, next to the handlebars, makes it a perfect location to store a quick snack, a phone and other electronic devices, or tools that are better stowed in a location that’s easy to access.
There are a few other baggage options that depend on what your bike frame can accommodate. For instance, if your front fork offers braze-ons or eyelets which allow for racks and platform mounts, and you’d like to add attachments this way then consider what types of accessories you’d like to add to your setup.

Types of Bike Packing
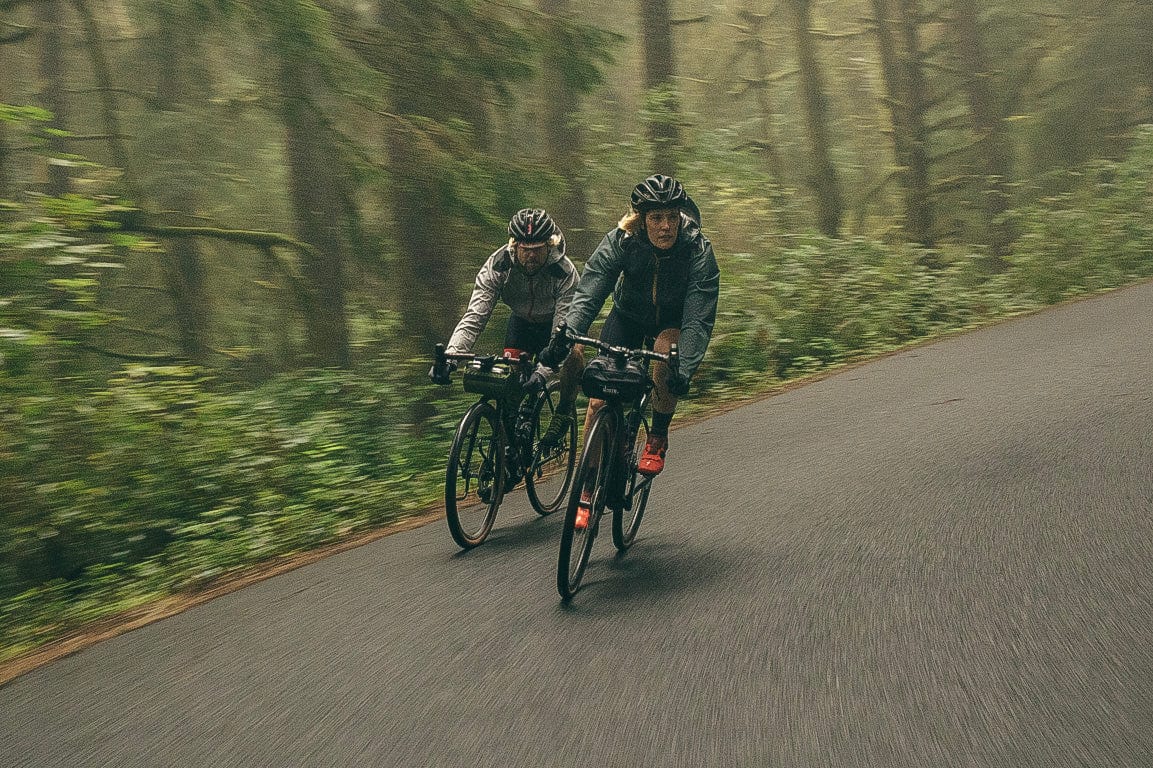
A multi-day mountain biking excursion is bikepacking at its core. In this case it’s all about exploring trails that you would find on a day ride. From a 40-mile, sub-24-hour overnighter to a multi-week excursion spanning hundreds of miles, multi-day rides could start close to home or require more logistical planning given the overall distance and one’s unfamiliarity with the trail systems.
Staff Tip:
"People make the place! Sure, solo riding is fun but rolling with a solid crew can't be beat."
Ultralight, Race, and Gravel is a self supported type of bikepacking that was popularized by the Tour Divide, a 2,745 mile bike packing race from Banff, Canada, to the Mexican border in Antelope Wells, New Mexico. Subsequent races have been developed all over the US, and increasingly, around the world. As the name suggests, this type of bikepacking usually involves the use of a lightweight mountain bike, or gravel bike that utilizes efficient, ultralight gear.
Expedition and Dirt Touring is an incredible way to connect with people and experience landscapes less travelled. This type of riding involves longer trips, more logistic complexity, and could very well mean traveling to a foreign country. Usually terrain includes dirt, gravel, and pavement, but could also include some more technical terrain depending on the route.
Bikepacking is an extremely rewarding activity that provides a unique opportunity to explore more with less. From multi-day rides that only require the bare necessities to month-long expeditions and dirt touring that will have you exploring far off lands, bikepacking is for everyone regardless of your skill level and gear. Like any new activity, it’s important to start small, gaining experience and confidence on each new ride. Learn as you go, and don’t forget that how you ride, what you bring, and where you ride will change as you continue to become more familiar with getting out on the saddle.
